Firing and post firing

Loading the Kiln
With very few exceptions, I choose to fire my sculptures in sections. This allows me the greatest flexibility in adjusting the gesture of the legs, arms, ears, and even tilt of the head when the piece is stable, fired, and I can see and install it in the correct position. This level of control is almost impossible to do when the piece is wet and hollow, so reassembling the piece afterwards allows me the most freedom as a sculptor.
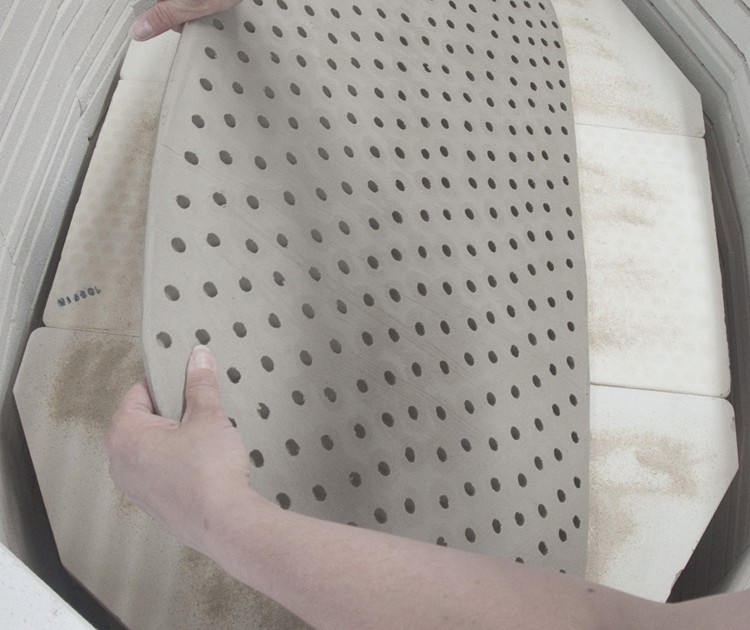
It is important to mention that in order to move these pieces safely before they are fired, I load the pieces into the kiln in the wet-leather hard stage. This way, the pieces can handle the stresses of being moved inside the kiln, and any repairs, adjustments or final touches are still possible.
When loading the kiln, if using an electric oval (see Kilns below), I remove all the rings, leaving just the floor of the kiln. I then line the sculpture up next to the kiln floor on an adjustable height cart, so that the cart and kiln shelf surface are dead even. The sculpture is then gently slid onto the kiln shelf (using a layer of newspaper, cardboard, and white silicone sand underneath to help it glide smoothly).


Kilns
During my student years and time spent in residencies, I have been able to make work in places with impressive facilities. At Ohio State University, there were several indoor kilns which allowed for very large work. I assembled a few of the most awkward pieces right inside the kiln, allowing them to dry safely without having to be moved. These were all gas kilns, and although I bow to the expert intuitive firing techniques of many other ceramic artists, I relied on a digital Fluke pyrometer to closely monitor the initial heating stages up to quartz. With my method of building, the drying and bisque firing conditions need to be tightly controlled. I have found that a slow drying period (1 to 2 weeks minimally) and a six day firing schedule accommodate this method of building with a minimum of complications.
Right now, in my studio, I have two electric kilns in which I fire all my work:
- Left: Skutt Oval Kiln: interior space 45″ length x 31″ width x 30″ depth
- Below: Olympic Oval Kiln: (not shown: 3 extra rings) interior space 41″ length, and 29″ width x 42″
The best feature of this type of kiln is the ability to remove all the rings, leaving just the floor of the kiln. Typically, I will load the large sections of the piece onto a shrink slab sitting on the kiln floor, then the rings are re-stacked, re-connected, the lid reattached.
The whole piece sits inside for a good week, making the moisture content in the work and the kiln atmosphere even. This time equalizing the moisture levels is a crucial step before the piece begins to be force dried (see Firing below). Being able to load and fire in sections allows me to create far more lightweight and complicated forms without worrying about breakage, and I am also able to make any necessary changes to the surface or supports while the clay is in a receptive state.


Firing
I use this schedule for cone 2 once-firing. Most of the structure of this schedule is a result of my observations and tests over the past 18 years, but I have padded it significantly to make sure I’m not taking any risks with pieces in which I have already invested 2-4 months of work! For a good concise reference of firing large scale sculpture, I recommend the book “The Ceramic Process” published by the European Ceramic Work Centre.
Although my clay body (Soldate 60) can easily go beyond cone 10, cone 2 is sufficiently strong for sculpture (barely starting the glassificiation), and it allows me to have a more porous surface for the desired patina. The lower temperature also allows for easier grinding and resurfacing, as well as avoiding an additional 5% shrinkage.
The sculpture is loaded in the kiln wet with shrink slab. It dries in the kiln with the lid closed at *least* 48 hours – preferably a week. A fan is placed in front of the top or bottom peep hole to encourage air circulation until 500-600° F. Kiln is then programmed to rise:
| Drying | Rate 1 | 50° F /hr | 100° F | 38° C | 8 hour hold |
| Rate 2 | 50° F /hr | 150° F | 66° C | 8 hour hold | |
| Rate 3 | 50° F /hr | 175° F | 80° C | 14 hour hold | |
| Rate 4 | 25° F /hr | 225° F | 107° C | 6 hour hold | |
| Rate 5 | 25° F /hr | 284° F | 140° C | 4 hour hold | |
| Rate 6 | 25° F /hr | 350° F | 177° C | 2 hour hold | |
| Rate 7 | 25° F /hr | 482° F | 250° C | 2 hour hold | |
| Rate 8 | 50° F /hr | 600° F | 315° C | 1 hour hold | |
| Heating | Rate 1 | 50° F /hr | 932° F | 500° C | 5-10 min. |
| Rate 2 | 25° F /hr | 1250° F | 677° C | 1 min. | |
| Rate 3 | 200° F /hr | 2100° F | 1148° C | 1 min. | |
| Cooling | Rate 4 | -250° F /hr | 1382° F | -750° C | No Hold |
| Rate 5 | -75° F /hr | 1112° F | -600° C | No Hold | |
| Rate 6 | -25° F /hr | 932° F | -500° C | No Hold | |
| Rate 7 | -50° F /hr | 482° F | -250° C | No Hold | |
| Rate 8 | -20° F /hr | 347° F | -175° C | No Hold |
In order to make this a 16-Section Ramp Firing on a Bartlett controller:
- Press Menu key to display “16-S”
- Press Enter to accept
- Press “1” until display shows “On”
- Press Enter to complete
- Enter the 8 segment program for User 5 and then enter the 8 segment Program for User 6
- Then recall user 5 and then press Start!


Post Firing
Misc Tools for Reshaping & Grinding Post-Firing
I use a whole host of power tools for working on the fired sections before reassembling. Sometimes I rework the forms in order alter the gesture and there is always a small degree of warping and distortion that I need to correct before gluing the sections back together. The following are some of the most used tools in my grinding/shaping/retexturing arsenal:
- Makita 4″ right angle grinder for rough cutting and shaping of fired stoneware
- Foredom Flex Shaft rotary tool with diamond sintered burs for medium and fine shaping
- 6 Dremel tools, each with a different diamond coated and tile cutting bits, so I don’t have to take the time to change them
- Makita 3″ x 18″ belt sander and heavy duty 50-60 grit belts for leveling the surfaces that make contact with wall or floor
- Variety of orbital sanders, sanding wheels and bits and cut sections of the heavy duty belt sandpaper glued to sanding blocks, rods, and angled pieces of wood
Most of these tools are used in every piece in order to refit and finish the seams as well as to perfect the illusion of a “soft flesh” clay surface coming into contact with wall, floor, or object. After shaping and grinding the form as closely matched to the gesture and texture as possible, the final surface is detailed with a clay-based kneadable epoxy (see Epoxies and Glues under the Materials page).
You may also like

