Materials


Sculpting
Oil Clay for Maquettes
Oil based clay for practice studies! My favorite oil clay is the J-MAC® Classic ® Clay AB 200 and can be found pretty easily on the web- I usually order from Arizonasculpture.com. I know that most folks really dislike working with oil clay as opposed to water clay, but this stuff is really easy and pleasant to work with- virtually no odor and soft on the hands without feeling too oily. You can use a heat gun for softening the surface or a small butane torch for spot heating and sticking pieces together as well. I do not use mineral spirits to soften the oil clay because I don’t want to deal with the fumes. I do work with the oil clay wearing Nitrile gloves, so that I can switch to having clean hands immediately. It is non-toxic, but I do find it difficult to switch to water-based clay without worrying about the residue.
Clay
For the past 18 years, I have relied on a cone 6-10 commercial clay called Soldate 60 from Aardvark Clayand Supplies. This clay was originally formulated by Joe Soldate in Southern California as a Raku body and is an EXCELLENT sculpture body: incredible plasticity, an unparalleled green strength for building large forms, versatility working back and forth between a pliable wet and structural leather hard state, and an ability to withstand high thermal shock. There is a similar product with the same name available from Laguna, but it is missing the key fireclay component that makes it so incredibly strong, plastic, and crack resistant as the Aardvark version. Its a fairly straightforward body:
50% Lincoln Fireclay*
25% OM4 Ball Clay
25% 60 Mesh Sand
2.5% Custer Feldspar.
* A certain percentage of the Fireclay, “Greenstripe,” adds a crucial plasticity and green-strength to the body, but has also been known to contain lime contamination. One disadvantage of this clay is also its massive shrinkage rate. From out-of-the-bag wet to fired cone 6, I have measured approximately 18% shrinkage. This means I have to build my pieces 15-20% larger than I envision the finished work – a large part of the engineering that I go through with each piece is due to this shrinkage and the complexities of a form that is going to change so much during the process.


Surfaces
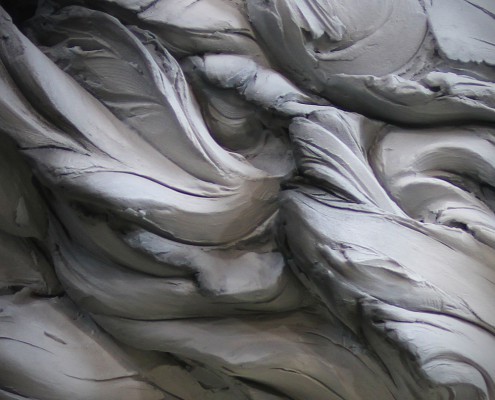
Most of the time, I am searching for surfaces that emulate the texture of wet clay or bare skin. The vitality and subtlety of terra sigillata and vitreous slips is sensuous, but the application of a fired clay surfaces often obscure much the fresh textural and gestural marks I use on my surfaces. Since I also fire the sculptures in sections and reassemble afterwards with epoxy, using a cold surface enables me to obscure the seams for an effortless looking gesture.
Slips, Sigillatas, and Engobes
However, I do occasionally still use fired surfaces on specific pieces where the ability to touch the form is important to me conceptually (see “Olympia”, “I’m sorry…”,”The Inquisitors”). The surfaces give the appearance of being pliable, moist, and vulnerable. I start with an OM4 clay for the terra sigillata and a Porcelain mix for the vitreous slip – adding 8-12% mason stain to each for color. I apply both the vitreous slip and the terra sigillata to bisque, since the textured surfaces are too fragile for handling when bone dry. This makes for a a slightly less durable bond between the sculpture and the surface, so I usually bisque low (cone 08), apply the slip in thin layers, burnish, and fire slightly over vitrifying temperatures.
But, my favorite surface treatment is flat interior latex paint.
Yep, that’s right… P A I N T. Read on, skeptics!
A while ago, I was searching for a reason to use color in my work, and I discovered Martha Stewart’s line of Designer Interior Latex. Besides the wonderfully suggestive color names, the brochure I saw claimed that these colors had been specially formulated to evoke certain emotional and psychological states when used in the home environment… I was in love. So I have remained faithful to the Martha Stewart line of Signature Designer colors ever since. Each time I create a piece, I consider which specific color to use on the surface of the work – often the ‘emotional content’ of the color and the emotional content of the form are in direct opposition with one another – creating a subtle tension between the exterior and interior of the piece. The domestic and the feral.
But! Paint??
I should mention that I am *very* particular about using a very high quality flat interior latex paint. If you look at a high quality can of flat interior latex, you will notice that 99% of the materials in that can of paint are calcined clay and other ceramic materials. So, in essence, I am using an unfired slip on the surfaces of my work… which gives me a beautiful clay-like matte feel to the sculpture. This way I can cover the seams of the reassembled fired sections – enabling me to work with much more freedom of gesture and scale than would otherwise be possible for my modest studio and kiln setup – without losing the soft and sensual feel of clay or the immediacy of the rough marks on the surface.
My preferred latex paint base is Sherwin Williams Superpaint, Flat Interior Latex. High clay content, super flat surface, and thinned with water and applied in careful layers.
If you would like to know more about the relationship between slip, glazes, and paint, I highly suggest checking out this article by Pete Pinnell: http://www.claytimes.com/articles/glazeadjusting.html
I can’t tell you how much I have learned from him though I have never met him.


Glues and Epoxies
One word of caution: There really isn’t a single epoxy resin out there that won’t yellow and chemically change over time. These are not archival materials. It is best if none of the glue is coming into contact with the surface of the clay work, as exposure to sunlight will cause the material to breakdown faster.
As a general rule, the faster the epoxy sets, the faster it will yellow and degrade. For this reason, I try to use glues that set as slowly as possible and are already formulated to withstand UV exposure and water. Marine grade epoxies are excellent, but sometimes difficult to work with given how long it takes for the joints to set.
The following materials are the brands/types I currently use:
Slow Bonding for Extra strength and Mixed Media
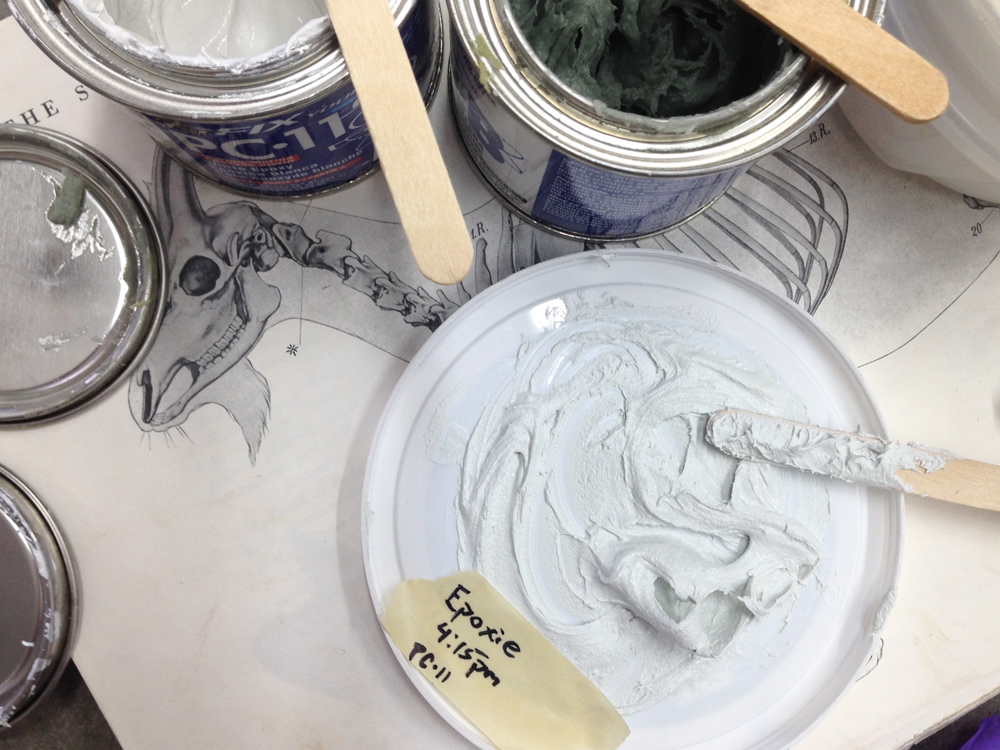
PC-11 and PC-7.
Okay, this stuff is Really Hardcore, but a little difficult to mix properly. You measure out equal parts of part A and part B by eye, and then mix the devil out of it, whipping as much air in as possible to help the catalyst and epoxy to mix as thoroughly as possible. I usually spend at *least* 10 min just mixing, and I switch the surfaces of my mixing palette mid-way through to make sure I don’t have any unmixed components on my palette or mixing stick. I then keep a small portion of the mixed epoxy around for 48 hours to make sure the glue I mixed and used in my piece set properly.
The PC-11 (cures white), is my favorite, since I can also use pigments to color the material to match the surface of my piece. I also use the colored PC-11 to level out the bottoms of my pieces to make them level and professional looking. This epoxy is also great for outdoor installation and mixed media, but as usual, it is good to test it out first before trying it on the work.
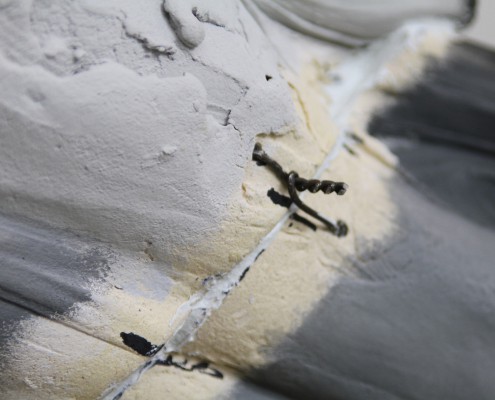
These epoxies do have a very slow setting time (12 hours!) that can often lead to the sections moving, sagging, or sliding out of position. To counter this, I always apply the thick PC-11 paste first, and then tack it into place with 5 minute gel to hold the seam together during the prolonged setting time. Even better, in order to keep the larger or more complicated sections locked together while the slow setting glues are curing, I often drill small holes in both sides of the pieces being joined, and use twisted picture hanging wire to hold the pieces together for 12-24 hours. The wire is then cut and removed, and the seam is spackled over with a slow setting kneadable epoxy/clay. A heavy-duty sealing primer is then dry sponged over the surface of the seam to lock in the chemicals and protect the glue from UV and moisture exposure.
For filling seams or cracks:
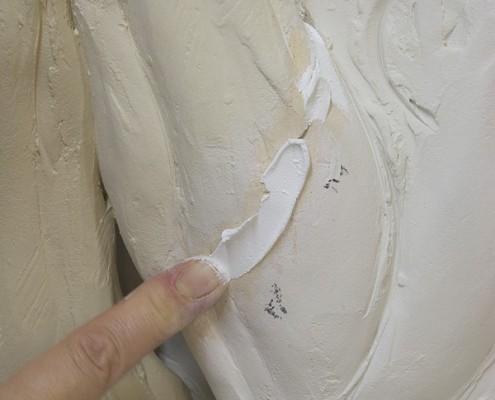
Apoxie Sculpt two part kneadable Epoxy.
This is a type of epoxy that is mixed heavily with clay, so that it moves and acts like the original water-based clay. It usually has a long setting time of 2-4 hours and can be smoothed with water and worked with the same tools you used to create the original work. I usually purchase the white so that I am able to tint it myself by kneading in mason stains and fired clay powder. This stuff is great for mimicking texture and color. Downside is that you really should use gloves to protect your skin from the chemicals during the mixing process at least. Prolonged exposure to it on your skin can definitely irritate and eventually lead to an allergic reaction over a long period of time. Using gloves to mix it, I haven’t had any problem over the last 10 years that I have been using it.
I order it from the company that makes it in order to make sure it is as fresh as possible (it does go bad over time, even unopened) from Aves:
Note about coloring Apoxie Sculpt from their website:
Absolutely…always mix A+B first wearing disposable gloves and then add the pigment of your choice. Different pigments will give different results… examples of commonly used pigments; We find that Acrylic paints give the product a gum like consistency – which some prefer, but others dislike….it does take quite a bit of acrylic paint to create a rich tone. Oil paints work exceptionally well and are the preferred colorant method – it take a VERY tiny amount to color a whole lot of product (toothpicks are helpful in swiping color onto the clay)…a little oil paint goes a LONG ways, if you mix too much paint it product will become very gooey. Powder Pigments work well – but they are messy. They give our product a bit more firm feel to it.
There are various other forms of kneadable epoxies out there, but I feel Apoxie Sculpt line has the best versatility and working time for the type of applications I’m using in reassembling my work after the firing. They have an excellent website with lots of good FAQ. They have a whole line of clay epoxies that work really well, but by far the best one I have tested is one called “Fixit-Sculpt” with a 4 hour setting time.
Important Note: All epoxies have a limited shelf life, even unopened! Finding fresh product is a bit hard to do unless you order it directly from the company (who knows how long it has been sitting on the store shelf?), but, once you have opened it, you only have about a month after it is exposed to air before it starts to degrade. However, you can extend the life of the material by storing the part A and part B in the freezer! I usually feel safe using frozen epoxy that I have labeled with an opening date up to 6 months old. Simply remove from the freezer about an hour before you want to you want to use it, and you are good to go.
You may also like

